The Wreck and the Rebuild
September first, 1999. 4 months after
the new paint job. 2 months after the tranny rebuild. The H/O was totalled by a
woman with a suspended license. I'll spare you the details, but she was
completely at fault, and the car in her husband's name had insurance. I'm all
healed up, but the H/O isn't quite, yet.
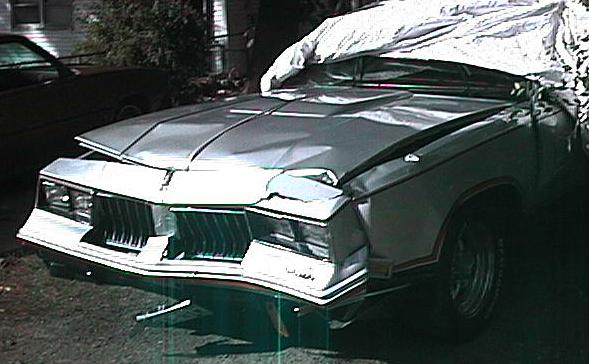
The insurance company
declared it totalled by a narrow margin.
I considered my options, replace or rebuild, and decided that
I could rebuild it. Better, faster, stronger. We have the
technology. I bought back the hulk, and used a portion of the money to
build the dream garage I've always wanted (gotta have a place to fix it *in*).
The rest went towards parts.
This time I'm going full frame-off restoration. While the frame could be
straightened, a new frame is much less expensive and I know it will be done
right, as good as new. While the frame is off, it's a good time to detail the
underside, firewall, POR-15 the frame, fix the rear main seal leak, and rebuild
the suspension.
And so begins a long process. If all goes well I hope to have the car
driveable by summer of 2001, and completely finished (repainted) by 2002. It
took a while to get started, since the first task was building a garage, and
completing my assortment of tools and equipment to handle the task. And then
there was just plain disgust with the whole wrecked car, I couldn't bear to look
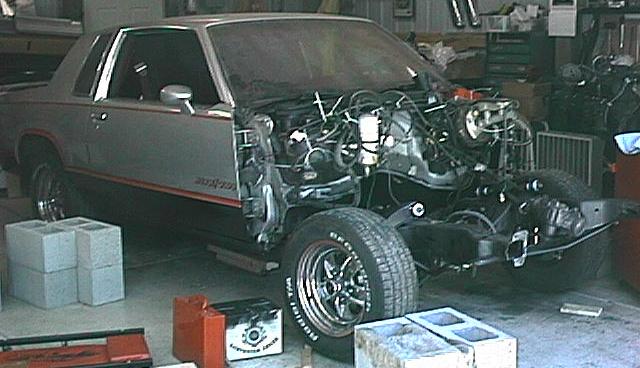
at my baby for quite a while. Some pictures of the progress follow.
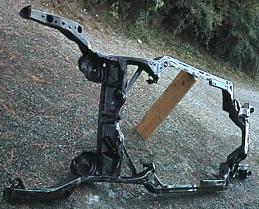
Here you see the new frame,
degreased and ready for stripping and painting.
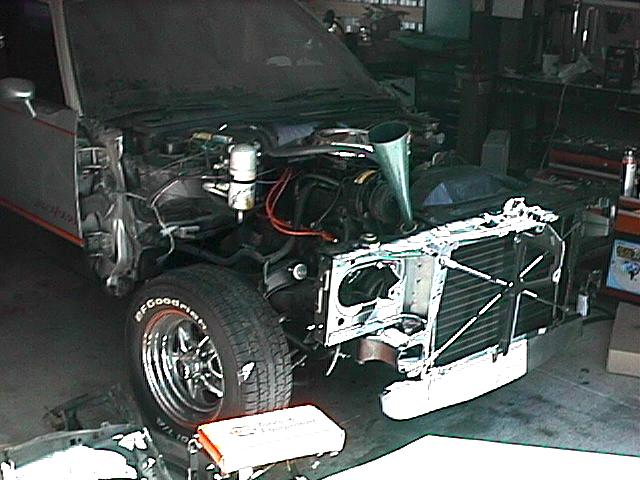
Body is off the frame.
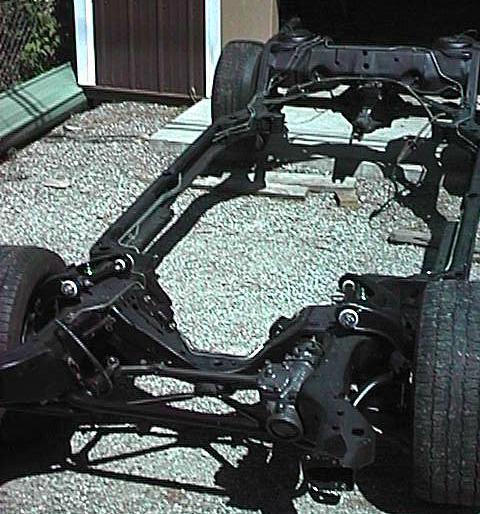
Rebuilt suspension on
new frame. Del-a-lum control arm bushings, poly bushings elsewhere, Moog 5660
springs, Bilstein shocks, drilled and slotted rotors, carbon-metallic brake
pads, and basically new or cleaned and painted everything.
Rebuilding the front end seemed intimidating at first, but it's really not. It's a lot of work, especially if you're going the extra mile to clean and repaint everything, but nothing too technical. If you're going to attempt this job, you'll need the following tools:
- An assortment of large metric sockets (1/2" drive), deep sockets, wrenches, and a breaker bar. Especially 15 and 17mm. I think there may have been a few 19-22mm bolts too.
- A tie rod separator (aka pickle fork). The manual says to separate them using a puller because you can damage the grease seal, I had no luck with that. The separator knocked them right out, and you're replacing them and the seals anyhow, right?
- A big hammer. 2 or 3 lbs should do.
- Lots of cleaning supplies. A wire brush and box of shop rags should do ya, unless you're repainting stuff, then you'll need sandpaper and a degreaser too.
I'm not going to give a step-by step on how to rebuild the front end (mostly because I didn't take notes), you don't really need instructions anyhow, just start taking parts off and putting new ones on. But I can offer some tips:
- Remove the brake dust sheilds before you disconnect the ball joints. This will involve removing the brakes and rotors first though. The lower a-arm will hit the dust shield on the way down and can tear it when the ball joint lets loose.
- To disconnect the ball joints, put a jack under the lower control arm. Run a safety chain through the spring and tie it around the frame with as little slack as possible. Unscrew the nut on the lower ball joint a few turns, but don't remove it from the stud. Whack the top of the ball joint stud/nut with your big hammer (hard!) a few times. It'll pop loose. Unscrew the nut the rest of the way, preferably using a few long socket extensions so your hand isn't anywhere near to be hit by the a-arm on it's way down. Then slowly let the jack down.
- Upper ball joints are removed in the same manner, although with no spring tension there now it's not nearly as exciting.
- Reinstall the upper A-arms using two 1/8" shims in each position as a starting point.
- To reinstall the springs I used a spring compressor, but I've heard of people just putting them in the lower a-arm and jacking it up. I had to cut several inches off the shaft on the top of my spring compressor to keep it from hitting the shock tower when compressed.
- When installing the new springs, or reinstalling the old ones, there's a few things to check. There's a rubber isolator on top of the spring. If it's up there stuck to the frame, you're good. If it fell down, tape it to the top of the spring, you'll never get it to stay up otherwise. The bottom of the spring must also be aligned. On the inboard side of the lower a-arm you'll see two drain holes in the spring seat. The end of the spring should sit between the two drain holes.
- Measure the length of the tie rods and assemble the new ones to be the same length. That should get your toe-in close enough to allow you to drive down to the alignment shop. Alternately, or as a double check, you can set the tires for about 1/16" of toe-in (measure between tires at back and front of tires, difference is toe-in).
- Torque down rubber bushings (stock a-arms) after the car is sitting on the ground under it's own weight. Definitely use a torque wrench and tighten according to specs.
I redid my rear suspension with 1LE camaro bushings (GM part number 10164152). They're a little stiffer rubber than the stock ones, and don't squeak and bind like polyurethane. The rear suspension is far simpler than the front. I had the bushings in the control arms pressed in at a machine shop, but I did the two in the rear housing myself. Here's the best way I found to do it for the at home mechanic who doesn't have a press or the fancy GM tools mentioned in the Chassis Manual.
Drill through the bushing with a 1/4" drill bit, make lots of holes all the way around and all the way through, space them as close as you can. Eventually the center section will start to come loose. Yank and twist on the center section with a pair of vice grips and pull it out. Use a pair of pliers to pull out the rest of the rubber bits. Cut two slits in the edge of the bushing shell (180 degrees apart) and then start whacking on one side between the slits with a hammer and chisel. Use an ordinary nail-driving hammer, not a big sledge, you don't want to break off the ears from the rear end. Collapse the shell and pull it out.
Clean the hole up, sand it lightly, and apply a thin layer of grease. Put your new bushings in the freezer for a few hours, or overnight if you can. If weather permits, leave your rear end out in the sun where it can get hot. This contracts the bushings and expands the holes, making the next step easier. Obtain a 1 1/2" pipe cap (cast iron) from the hardware store. This fits perfectly over the flanged end of the bushing. Place cap over bushing and drive it into the hole (again, use the small hammer and lots of little taps).

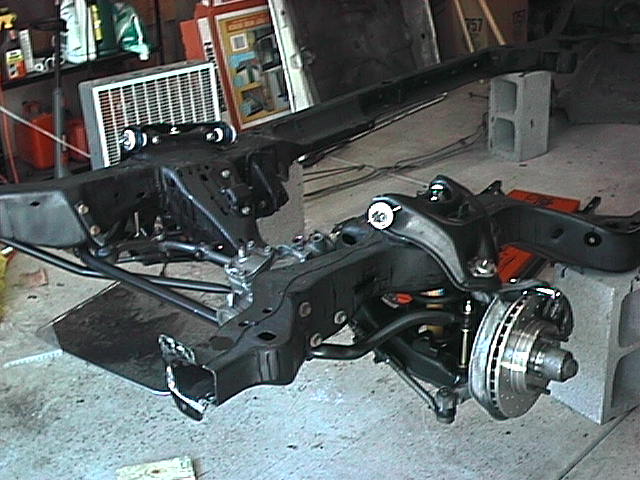
The new frame with suspension, ready to go.
Front shot of the new frame.
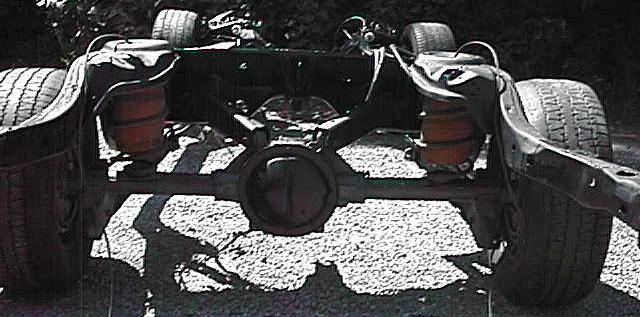
Rear shot. Sway bar and shocks not yet installed.
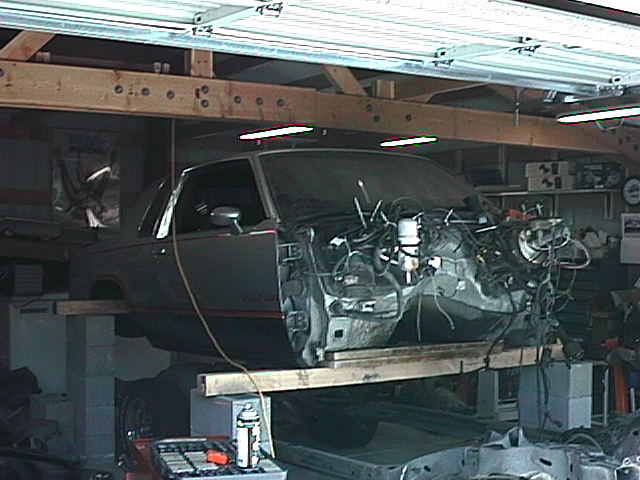
And now, we're really making some progress. Unite the body with the frame!
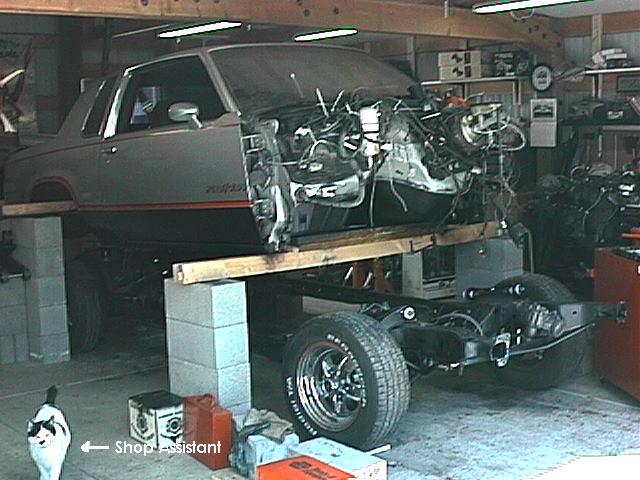
New frame rolled underneath and centered, with the help of my shop assistant.
Front Shot, note I rolled the tranny underneath first.
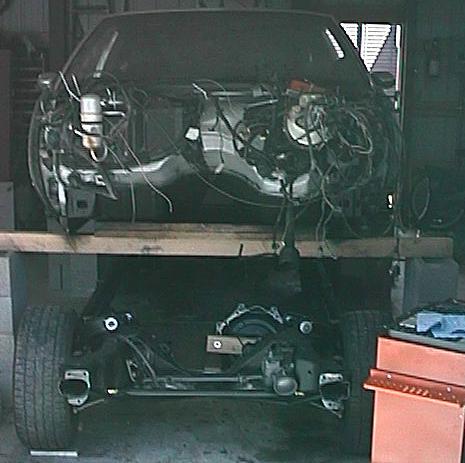
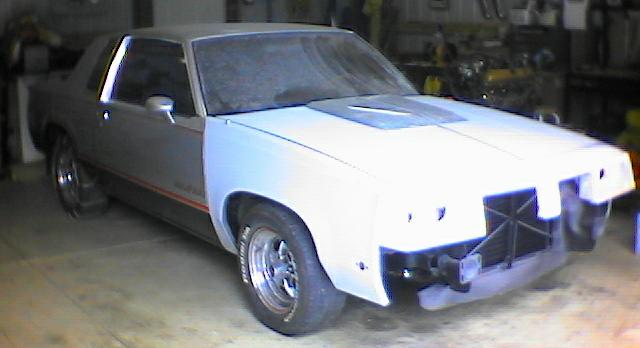
Wow, it looks like a car!
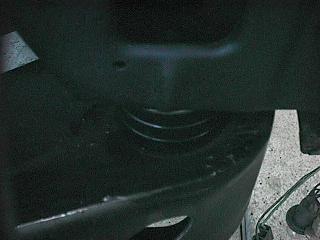
Close-up of the new poly mount in #2 position.
All hooked up and ready for a test fire.
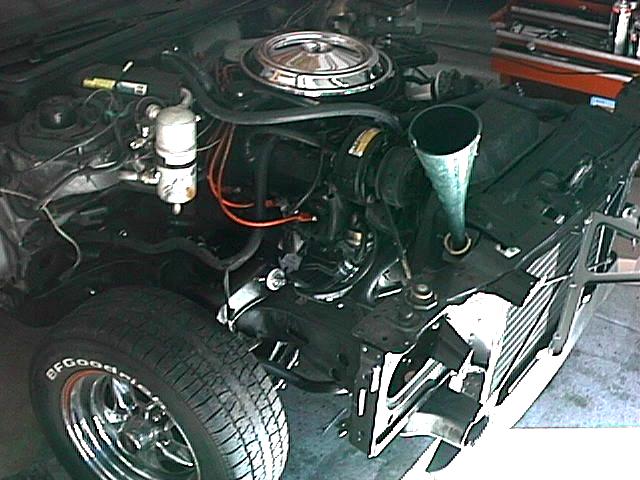
Same as above, but closer in.

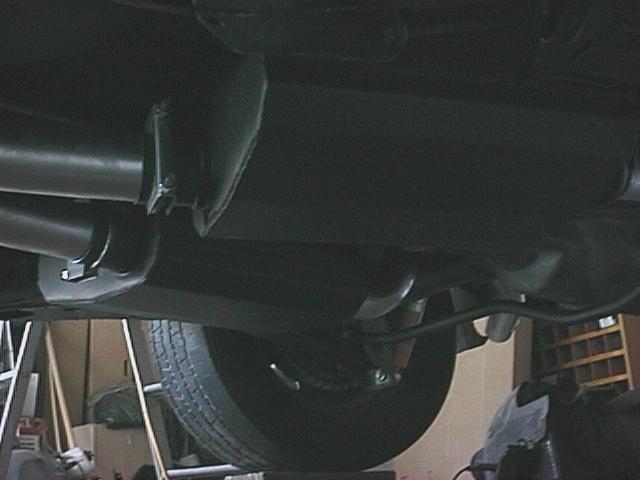
My nice clean underbody, everything painted, cleaned, etc. New cat too.
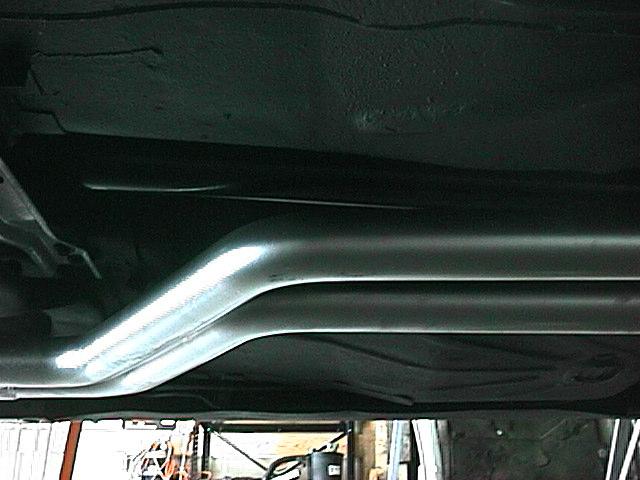
The mid-section (Y pipe) of the Hooker exhaust.
The new Hooker Maximum Flow mufflers.

She runs and drives! Though not exactly street legal yet :-) At this point I'm just out testing to make sure everything (like brakes) work
before loading it onto the flatbed truck for delivery to the body shop for installation and alignment of the front clip.
Back from the body shop! All new sheet metal from the firewall forward, aligned even better than it fit originally.
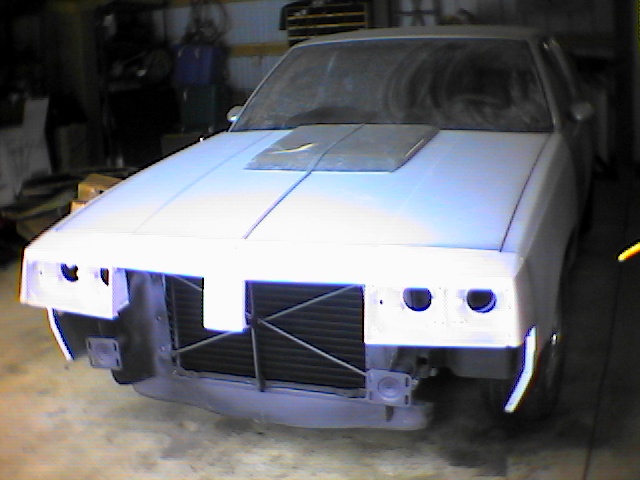
Front view of new clip. Lots of detail work now before its ready for painting.
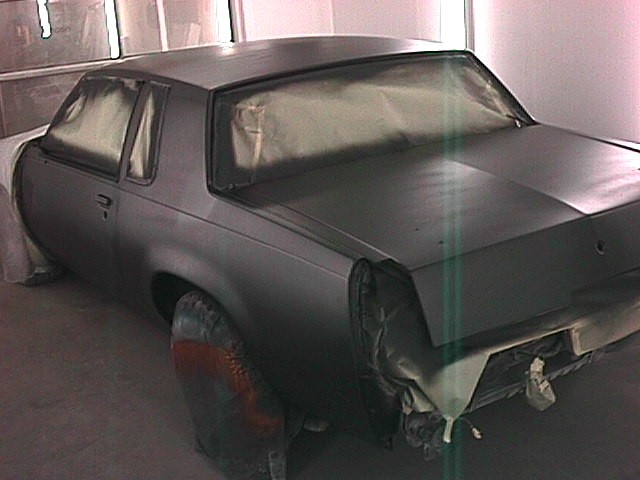
In the paint booth with a coat of sealer.
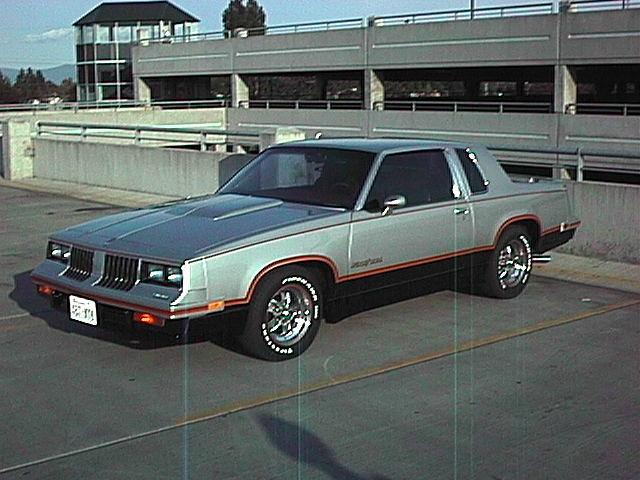
The finished product! All together with new stripes, new tires, weatherstripping, etc. Inspected, licenced, through emmissions, and insured! *whew*

Side view, a close up of the lauren stage 1 body kit. It blends in very well, most people do not notice that it's out of place.
Go back to my Hurst/Olds
page